Install Go
Before we start learning, we need to install Go. Open a terminal and run the command for your operating system:
1 | brew install go |
1 | sudo snap install go --classic |
1 | winget install GoLang.Go |
Verify the Installation
Once the installation finishes, reopen your terminal and run the command below. If it prints a version number1, the installation worked:
1 | go version |
Set Up the Development Environment
Install Visual Studio Code
You can write Go in any text editor, but an editor that offers code completion and highlights errors makes coding easier and more comfortable. In this series I use Visual Studio Code (VS Code for short). Again, run the command for your operating system:
1 | brew install --cask visual-studio-code |
1 | sudo snap install code --classic |
1 | winget install Microsoft.VisualStudioCode |
You can also download the installer from the official website. Using another editor (for example GoLand2) is fine too, and nothing later in the series depends on this choice.
Install the Go Extension
VS Code does not understand Go by itself, so we need the official extension maintained by the Go team, Go. It connects us to Go’s language server, gopls, and features such as code completion, go to definition and instant error checking all depend on it.
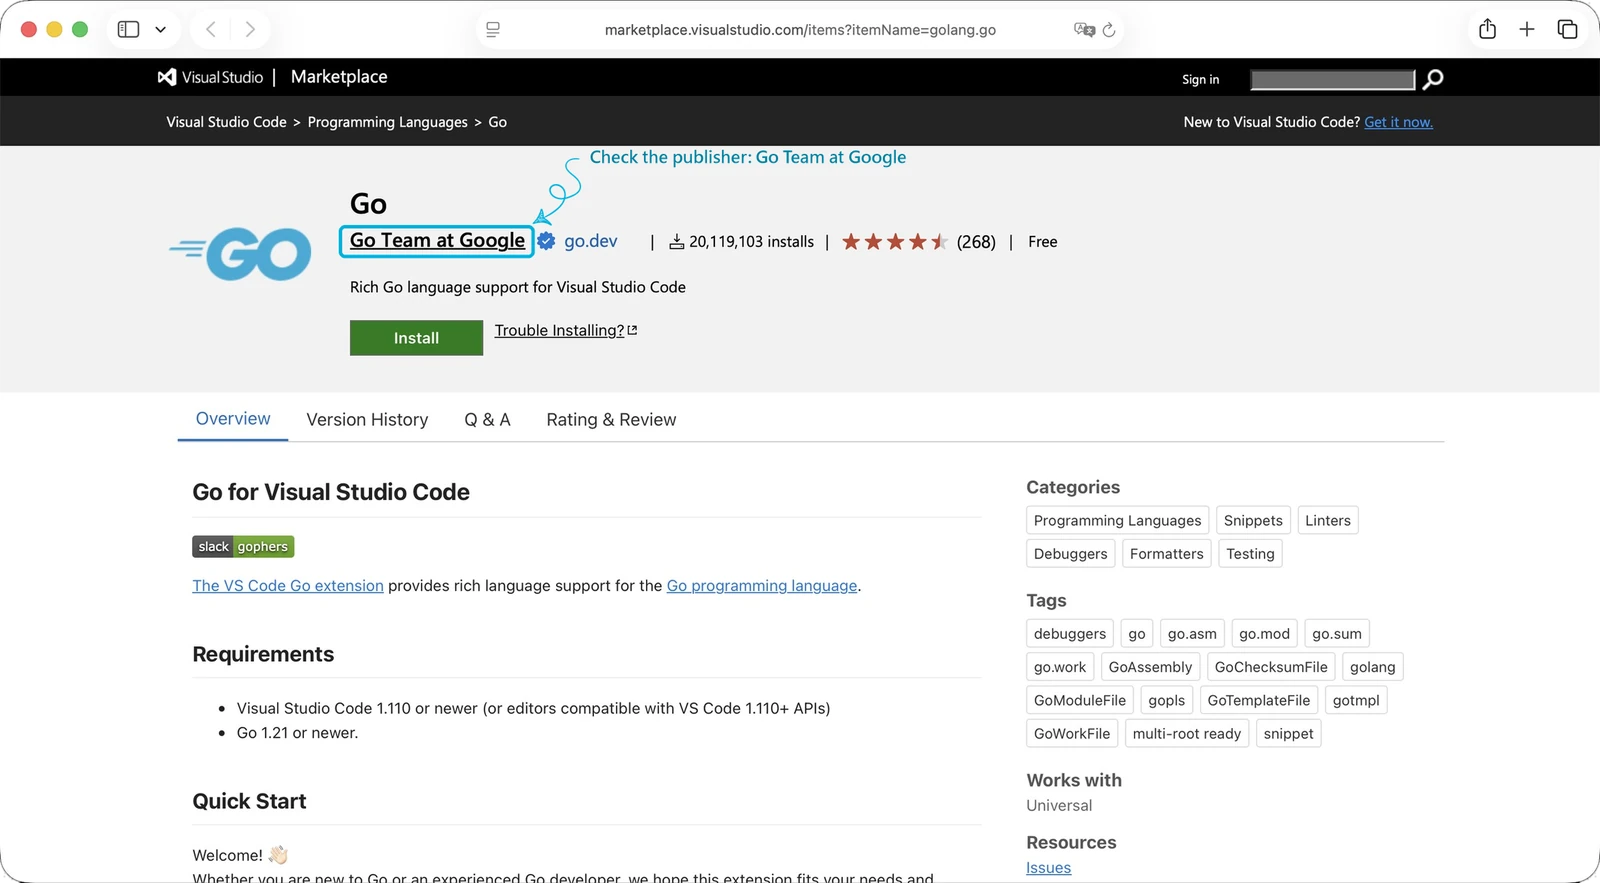
In the Extensions panel on the left side of VS Code, search for Go, pick the one published by Go Team at Google, and click Install. If you prefer the command line, run this in your terminal:
1 | code --install-extension golang.go |
After it is installed, the first time you open a .go file, a prompt appears in the bottom right corner asking you to install the helper tools the extension needs (such as gopls). Just click Install All.
Create Your First Project
With the environment ready, it is time to write some code. First, create a folder for the project and move into it in your terminal (you can name the folder anything; I use hello-go here):
1 | mkdir hello-go |
Once you are inside the project directory, you can initialize a Go module (what that means is a topic for a later post). The command looks like this:
1 | go mod init <module-path> |
For this project, run the following in your terminal:
1 | go mod init hello-go |
If everything goes well, a go.mod file is created:
1 | go: creating new go.mod: module hello-go |
Write Your First Go Program
Now that the Go module exists, we can create our first Go program in the project folder: main.go.
1 | touch main.go |
Then open it and write:
1 | package main |
Here is what each line does:
| Code | Explanation |
|---|---|
package main |
This file belongs to the main package, and a main package is compiled into a program you can run directly |
import "fmt" |
Imports the fmt package from the standard library, which handles formatted output |
func main() |
The entry point of the program, where execution starts; it takes no arguments and returns no value |
fmt.Println("Hello, Go!") |
Calls Println from fmt to print the text followed by a new line |
Run and Build
After writing the code in main.go, go back to the terminal and check that the program works. Go gives us two ways to run it: go run and go build.
Run: go run
In the project folder, run:
1 | go run main.go |
If everything goes well, the terminal prints:
1 | Hello, Go! |
go run compiles the program and runs it right away without leaving an executable behind. It is handy for quick tests while you develop, and it feels a lot like python main.py in Python.
Build: go build
In the project folder, run:
1 | go build |
An executable file appears in the folder, named after the module, so it is hello-go (on Windows it also gets an .exe extension). Then run it with the command for your operating system:
1 | ./hello-go |
1 | ./hello-go |
1 | .\hello-go.exe |
It prints Hello, Go! again. This executable already contains everything it needs to run, so you do not need to install Go on the machine. You can copy it to any computer with the same operating system and architecture and it will run.
Summary
In this post we installed Go and VS Code, created a module with go mod init, and wrote our first Go program. In the next post, we will start with Go’s basic types and control flow.
1. At the time of writing, the Go version was 1.27.3. If anything here is unclear or out of date, please follow the official documentation for the version you installed. ↩
2. GoLand is a paid product from JetBrains. It comes with a 30-day free trial, and students and teaching staff can use it for free after verifying their status. For licensing and pricing, see the official pricing page. ↩